Category: Mains

Mains recipes with a twist of tortillas

  • Authentic Chiles en Nogada

    Authentic Chiles en Nogada

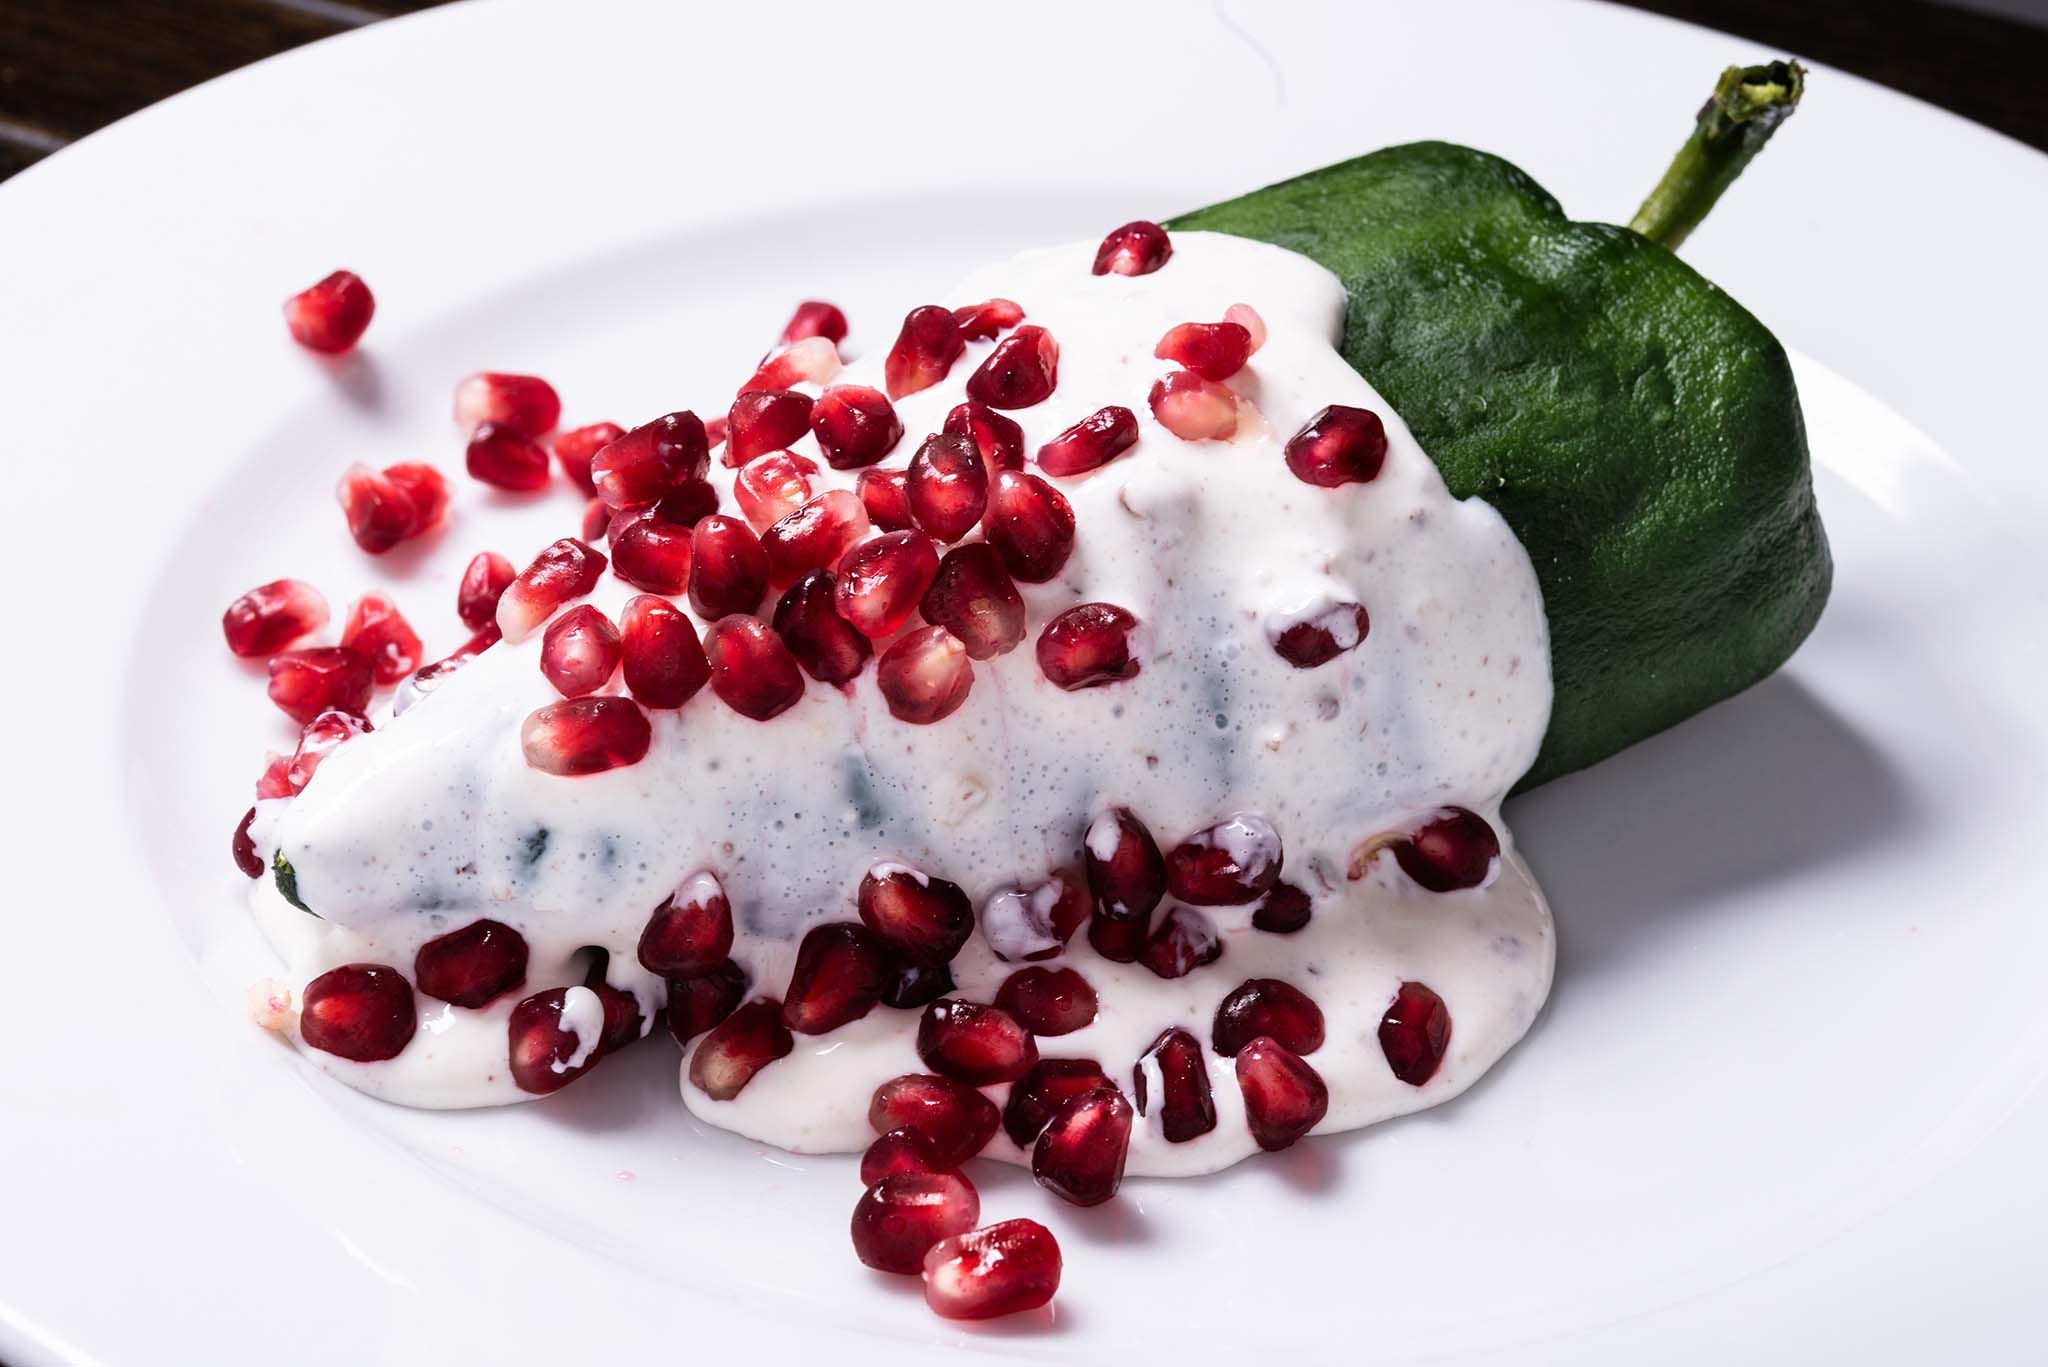
    Chiles en Nogada: Poblano chiles, stuffed with picadillo and topped with a walnut-based cream sauce, pomegranate seeds and parsley. Mmm! This dish is not only tasty but rich in history. Invented in 1821, it’s closely associated with September’s Mexican Independence celebrations.

    https://mexicanfoodjournal.com/chiles-en-nogada/

    Ingredients

    Filling


    Nogda


    Garnish


    Directions

    Precook the meat:

    Place the meat in a pan and just cover with water. Bring to a simmer and cook the meat until just cooked through (about 20 minutes) turning once. When the meat is cooked remove it from the pan and allow it to cool to the touch. Reserve the cooking liquid.

    Chop the ingredients:

    Chop the meat into cubes first then chop finely. Chop the onion, carrot, zucchini, potato and candied fruit into ¼” cubes. Chop the almond very fine.

    Prepare the tomato base:

    Slice the tomatoes in half and add them to your blender with ½ cup of the cooking liquid from the meat. Blend until smooth but not liquefied.

    Cook the filling:

    Fry the onions in 3 tablespoons of oil for 2 minutes. Add the potatoes, stir and cook for 5 minutes. Add the chopped meat and stir. Add the pureed tomato. Add the carrots, zucchini, and raisins and cook for 5 minutes until the tomato puree is starting to reduce. Add the peas, biznaga or candied fruit and almonds. Stir well. Cook for 15 minutes until all of the vegetables are fully cooked and tender and the liquid is reduced.

    Note: If the filling starts to get too dry before all of the ingredients are fully cooked add the cooking liquid from the meat a few tablespoons at a time as needed.

    Roast and clean the poblano chiles:

    Place the chiles over the open flame on the burner on your stove. Note: Do not leave chiles unattended. Blacken and blister the skin on all sides. When you have roasted all of the chiles place them in a plastic bag to sweat them. Scrape the skin the chiles with the blade of a knife. Using a small knife, gently split the chile down the side without cutting all the way through the tip of the chile. Remove the seeds inside the chile with your fingers without tearing the chile.

    Prepare the Nogada:

    Place the cream, walnuts, and cinnamon in your blender. Blend until the walnuts are completely incorporated into the sauce and the sauce is smooth.

    Prepare the garnishes:

    Slice the pomegranates in half. Remove the seeds from your pomegranates. Chop the parsley very finely reserving a few leaves to use as decoration.

    Assemble and serve the Chiles en Nogada.

  • Gorditas

    Gorditas

    Gorditas! Small corn cakes with a little stuffed pocket brimming with just about any yummy filling. Perfection and just the thing to make on a weekend. Cook ‘em on a gridle, fry them or bake them. Your call, just enjoy!

    https://www.isabeleats.com/gorditas-recipe/#wprm-recipe-container-9669

    Ingredients


    Directions

    Mix together masa harina, water and salt to create a dough. Roll the dough into 16 little balls. Heat a large skillet, griddle or comal over medium-high heat.

    Lightly flatten a masa ball in between two sheets of plastic wrap using a tortilla press or a flat pan. Make sure not to press it down too much as it will become too thin like a normal corn tortilla. You want it about twice as thick as a normal tortilla.

    Remove flattened masa from the plastic wrap and place it on the hot griddle. Let it cook for about 10 to 15 seconds, flip it over and let that side cook for another 10 to 15 seconds.

    Flip it over one more time and cook each side for about 1 minute, until it has beautiful brown spots.

    At this point, you should notice that the gordita inflates a little bit and starts to bubble up in the middle or the sides. This is exactly what you want. Lightly press down on the sides of the gordita with a spatula or other utensil to help it inflate even more. Remove it from the griddle, place it on a plate and cover it with a light kitchen towel.

    As soon as you can handle and hold the gordita (it should still be hot but not hot enough to burn you), use a butter or paring knife to cut a slit down the edge of one side. The gordita should open up and create a pocket.

    Fill gordita with desired fillings and enjoy.

  • Chalupas

    Chalupas

    Meet the chalupas. Not the fast food variety, but the real thing. They take a little while to cook up but some things are worth the extra effort, like these!

    https://www.garlicandzest.com/authentic-mexican-chalupas/

    Ingredients


    Directions

    In a heavy bottomed medium skillet (that a whole flat tortilla can fit into) add about ¼” of canola oil. Set over a medium to medium high heat. When the oil is hot, but not smoking, rest a tortilla on the oil (it will float like a boat) and let it cook for about a minute, until bubbling. Spoon 2 tablespoons of salsa into the center of the tortilla and gently spread it around, but not quite to the edge. Continue to cook for 2/3 minutes or until the tortilla edges and bottom are crisp. It’s okay, if a little hot oil touches the salsa.

    Transfer the chalupa to a tray lined with paper towels to drain. Continue in this method with the rest of the tortillas.

    Divide the chicken or pork and queso fresco over the chalupas. Garnish with cilantro and extra salsa verde if desired.

  • Tamales

    Tamales

    It is corn time and time to do something with those husks. What you ask? Tamales, of course! Not a quick fix for dinner but well worth the effort. Fill them with salsa verde chicken, refried beans and cheese or red chili pork. Mouth watering isn’t it?

    https://tastesbetterfromscratch.com/mexican-tamales/

    Ingredients


    Filling Ideas


    Directions

    Soak the corn husks in a bowl of very hot water for 30 minutes or until softened.

    Prepare desired fillings.

    Make the masa dough: in a large bowl, use an electric mixer to beat the lard and 2 tablespoons of broth until fluffy, about 3-5 minutes. Combine the masa flour, baking powder, salt and cumin in a separate bowl; stir into the lard mixture and beat well with an electric mixer.

    Add the broth, little by little to form a very soft dough. Beat on high speed for several minutes. The dough should spread like creamy peanut butter and be slightly sticky. Cover the mixing bowl with a damp paper towel, to keep the dough from drying out.

    Assemble the tamales: lay a corn husk, glossy side up, on the counter with the wide end at the top. Scoop about ¼ cup of dough onto the top, center of the corn husk. Lay a piece of plastic wrap over the dough and use your hands to press and spread the masa into a thin layer, about ¼ inch thick. Keep the dough spread along the top half of the corn husk to allow plenty of room to fold the bottom husk up, when it’s time.

    Place 1-2 tablespoons of desired filling in a line down the center of the dough. (You don’t want too much filling).

    Fold in one long side of the husk over the filling. Fold in the other long side, overlapping the first (like folding a brochure). Fold the bottom of the husk up.

    Tying tamales (optional): You don’t have to tie a corn husk string around the tamales – it does take more time and they will hold together without it. However, if you’re making multiple fillings tying ones of a certain kind can help to identify them.

    Cook on the stove-top or Instant Pot: Add water to the bottom of your steamer or instant pot. (About 1 cup for IP and a few cups for a steamer pot – don’t fill above the steamer rack.) Lay a few extra corn husks on the bottom rack to keep the tamales from falling through and any boiling water from directly touching them.

    Place tamales standing upright, with their open end up, just tightly enough to keep them standing. If using a steamer pot, lay a few soaked corn husks or a wet towel over the top of the tamales before closing the lid.

    Steamer: bring water to a boil (in Mexico they would often place a coin at the bottom of the steamer and when the coin started to tap in the pot you know the water was boiling.) Once boiling, reduce to a simmer and steam for 45 minutes to 1 hour. Check them after 45 minutes.

    Instant Pot: Cook on Manual/High Pressure for 25 minutes. Allow pressure to naturally release for 10 minutes, and then quick release.

    To test if the tamales are done: Remove one and try to pull the husk off. If the husk pulls away cleanly from the tamale they’re done. If the dough is still sticky or wet looking, cook them for 5-10 minutes longer and try again.

    Store leftover tamales in the refrigerator for 5-7 days depending on the freshness of your ingredients.

  • Mexican street corn

    Mexican street corn

    Mexican Street Corn! It’s like a party in every bite! Once you try this combo of corn on the cob, seasoning, cheese and lime juice, you won’t want to go back to plain old corn on the cob.

    Ingredients

    Ingredients


    Directions

    Add 1 teaspoon of salt, bay leaves, and thyme (or epazote if that is what you are using) to boiling water and then add the corn on the cob and cook for approximately 30 minutes.

    Strain the water from the corn and cover each corn on the cob with lime juice and additional teaspoon of salt (you can add more if necessary)

    Cover in mayonnaise and then roll each corn on the cob in the queso fresco and sprinkle with chili powder.